Showing posts with label holidays. Show all posts

Tuesday, December 13, 2011

Beautiful Baby's Breath

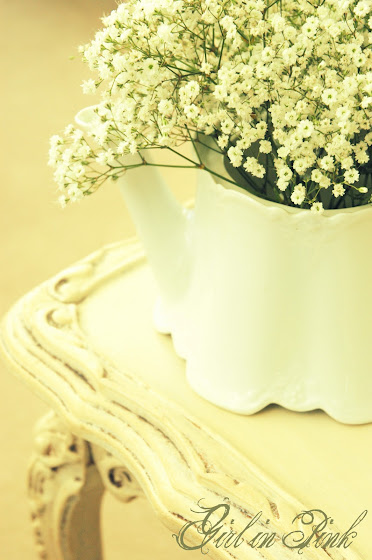
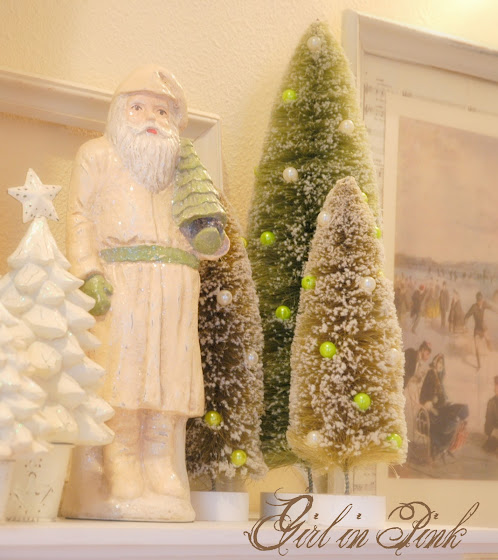
I spotted bundles of lovely baby's breath at the grocery store last weekend.  They were quite inexpensive and there was something magical and Christmas-like about them, so I treated myself.  I am enjoying the little bundles in my old chippy white pottery pieces.  Amongst the white village, I think they look like bushy little snow covered trees!
I recently came across a couple of beautiful photos on Pinterest of baby's breath being used in creative and unexpected ways.  I love these hanging poms...
This wreath is simple yet so elegant and whimsical...

Baby's breath is so often used as filler in flower arrangements, but it makes such a lovely statement on it's own, and not just for weddings!  I think it's going to be my new favorite Christmastime flower!  You may even see it in my Christmas tree next year!

Thank you for your sweet visit!  I hope your week is off to a great start!
Best Wishes and Blessings,
Amanda

Join me at these fun blog parties!
White Wednesday at Faded Charm
Wow us Wednesdays at Savvy Southern Style
Primp Your Stuff Wednesday at Primp
Share the Love Wednesday at Very Merry Vintage Style
What's It Wednesday at Ivy and Elephants
Sew Crafty Tuesday at Ruby Jean

Thursday, December 8, 2011

Please Join Me on a Little Holiday Home Tour!

Christmas has officially arrived at our house!  Please join me on a photo tour...I'll try to keep the commentary to a minimum!  I just have to point out a little gift I bought myself this week!  The vintage birdcage stand you see here, I picked up to hang my mini chandelier from.  This is the chandelier that has been hanging in my space at the store with a "display only" sticker on it for several months.  I am so happy to finally have a place for it at home!  The first thing I do when I wake up in the morning is turn on the chandelier, and the Christmas tree lights!  It's pretty in the daylight... 
But it really sparkles at night!
I also wanted to mention that I've made some changes to the furniture arrangement in this room since I received some wonderful advice from those of you who commented on my "Design Challenge Feature" with Debra at Common Ground!  Of course it looks a bit different when the tree isn't here, but the idea of a cozy grouping of furniture nearer to the fire has made the room so much more comfortable and inviting.  I am still on the lookout for a few key pieces that were suggested.  Thank you once again, Debra for featuring my room!  I plan to post more updates as I continue to make changes here!
We opted for a Frazier tree this year.  I still prefer a Noble, but this one trimmed up nicely.
Instead of ribbon, I used torn strips of natural muslin to dress up the gifts this year.
Moving onto the dining room...

And into the kitchen...
Decor on the Pantry door...
Candlelit kitchen window sill...
Looking in on the breakfast nook and family room...
On the family room mantle...
We are all more than a little excited around here about the quickly approaching holiday!  Here I captured Bootsie intently staring at the Christmas clock!
And that brings our little tour to an end.  Thank you so much for joining me!
Best Wishes and Blessings to you and your family, this Christmas season and always!
Amanda


I am thrilled to be joining in these fun parties and can't wait to make my way through blogland to be inspired by all of the talent and creativity being shared this week!


 "Vintage Christmas" Block Party at Common Ground
Feathered Nest Friday Holiday Vignettes at French Country Home
Fridays Unfolded at Stuff and Nonsense
Show and Tell Friday at My Romantic Home
Home Sweet Home at The Charm of Home
Christmas Trees Block Party at 2805
          Christmas in the Kitchen Block Party At the Pickett Fence
Pink Saturday at  How Sweet the Sound
Show off Your Cottage Monday at House in the Roses

Thursday, December 1, 2011

Skating at the Central Park

A couple of weeks ago I absolutely fell in love with this vintage print at the Salvation Army.  "Skating at the Central Park" by Winslow Homer.  It was a bit more than I would usually pay for something to resell...not much of a profit to be made, but I decided to splurge and bring something home for myself this time!  Turns out this print is not hard to find...if you love it like I do, you can pick one up off of Ebay for a modest price.  I did some tweaking in regards to the frame and mat to better suit my decor.  Here's what it looked like when I first brought it home...
Painting the frame cream was a given, but I had to think a bit about what to do with that bright green mat.  I eventually decided to tear pieces of sheet music and carefully adhere them to the original mat with a glue stick.  This was easy and so much more cost efficient than buying a new mat...which I would have surely have had to have custom cut. 
The overall size of the framed print didn't end up being large enough to hang above our living room mantle where I had originally pictured it, but I managed to find a good spot for it where it is being enjoyed and admired!
I just love the colors in this print, and the beautiful dresses and hats on the ladies.  This scene really reminds me of Little Women...now, I'm in the mood to watch the movie!  I wonder if it will be streaming on Netflix this season? 
I've loved every version I've seen.  Which is your favorite?
Of course no one has played Jo quite like Katherine Hepburn!  She was one of a kind!
I am such a fan of Elizabeth Taylor, that I couldn't not mention the 1949 version as well!  So many great old Christmas movies!  I look forward to re-watching them every year at this time, as I wrap gifts and work on Christmas crafts!

Thank you, dear friends for stopping by!  I am so very excited about the Christmas Blogger Block Party next week!  I will be sharing our Christmas decor (it's almost complete!) as well as some other festive things I've been working on!  I can't wait to see what everyone else has been busy doing to get into the Christmas spirit!

Best Wishes and Blessings,
Amanda


You'll find me partying with these sweet gals!

Debra - Vintage Inspiration Friday at Common Ground
Cindy - Show and Tell Friday at My Romantic Home
Sherry - Home Sweet Home at The Charm of Home
Courtney - Feathered Nest Friday at French Country Cottage
Honey - Potpourri Party at 2805
                                 Vanessa and Heather - Inspiration Friday At the Pickett Fence

Tuesday, November 29, 2011

Ruffled Christmas Tree Pillow Tutorial

I am so happy to see that ruffles are still in vogue!  They seem to be everywhere in fashion, home and seasonal decor this year and I just love the soft, easy, romantic feeling they evoke!  I had an idea for a throw pillow with an appliqued ruffled tree that I couldn't wait to try.  I think it turned out pretty cute and it could easily be customized to suit a variety of decorating styles.
I started by tearing a strip of natural colored muslin, approx 2 inches wide, and 2 yards long. A small rectangle of burlap will serve as the trunk of the tree, 2" x 1.5."
There are many different methods for creating ruffles.  I was going for quick and easy, so I just fed my length of muslin through my sewing machine, sewing down the center and gathering the fabric with my fingers with each stitch.  You could buy pre-made ruffle trim at the fabric store, and if you're not into sewing, you could even hot glue the ruffles onto a store bought pillow!
If you're making your own pillow cover, you'll want to cut two pieces of fabric the appropriate size to cover the pillow form you're using.  Be sure to leave room for a seam allowance.  I used canvas drop cloth here and folded the front panel with the corners together, finger pressing the center.  This way, when I opened it up to apply the ruffles, I had the center marked for lining everything up evenly.
Next, I cut 5 lengths from my muslin ruffle:
1.  12 inches
2.  10 inches
3.  8 inches
4.  4 inches
5.  1.5 inches
I also cut a 12 inch piece of vintage lace to act as the tree skirt.  I pinned the ruffles, lace and burlap into place to form the tree, using that center fold line in the canvas as a guide.  I then took the panel to the sewing machine and sewed down the center of each ruffle (right over the stitching I'd done to create the ruffle).  I stitched around the edge of the burlap piece to create the trunk.  At this point I think it would be fun to play with some trim...adding buttons or beads as "ornaments."  I started to add some pearly buttons to mine but decided I really liked it as is.  A burlap star on top would be cute too!  So many possibilities!
Once I had the the tree just how I wanted it, I pinned my pillow form, right sides together and sewed around the edges, leaving a section of the bottom open.  I then turned the cover right side out, inserted my pillow form and stitched up the bottom by hand.
This festive little pillow was so fast, fun and easy to make!  I hope my instructions were clear enough to help you make your own if you so desire.  Please let me know if you have any questions!  I am happy to help!

I hope you're having a wonderful day!  

Take care!

Best Wishes and Blessings,
Amanda


I will be participating in these lovely weekly blog parties:
 
White Wednesday at Faded Charm
Wow us Wednesday at Savvy Southern Style
Open House Party at No Minimalist Here