Thursday, February 18, 2016

Image Transfer Time Lapse Video, Mon Chéri


As promised, I have a quick time lapse video to share with you today!  This one features Artisan Enhancements Transfer Gel, Pearl Plaster and Scumble Glaze!

Have a look and then scroll down to the bottom of this post if you are interested in the step by step details involved in creating this finish!


I found this beautiful authentic vintage tinted photo on Etsy and had it printed to fit my cabinet door at my local UPS Store on their laser color printer.  Your image must be laser printed to work with the Transfer Gel.  If the image had any text on it, I would have needed it printed in reverse in order for it to transfer correctly.

I painted my cabinet door first, but I have also transferred images directly onto wood, so I know that works too!  I like to transfer onto a smooth finish, so I lightly sand my painted board before painting an even coat of Transfer Gel onto it.  I apply it with a brush but you can also roll it on, just make sure you put enough on that the image is really going to adhere, but not so thick that it's drippy and oozing out the sides.  Lay down your printed image immediately, before the gel starts to dry.  Smooth the paper out carefully with your fingers, avoiding creases and bubbles if possible.  

Allow the gel to dry completely.  I usually let mine dry overnight but I have left them for several days and still had good luck with the image transferring.

Once dry, you are ready to carefully remove the paper fibers from your project to reveal the transferred image.  Roll up your sleeves, grab a damp sponge and don't rush it!

It’s important to know and remember that the image is supposed to sit on top of the Transfer Gel, so if you rub too hard and rub away the gel, you will also rub away the image.  I strongly recommend practicing this process once or twice on a sample board before attempting to transfer an image onto a surface that you have gone to a lot of work to prepare.  As tempting as it may be, don’t use the scrubby side of a sponge to remove the paper!  Just roll the paper pulp gently with your fingers, and do your best to be patient with this process.  It will be well worth your effort!

You should know that as many times as I have done this, I always end up with areas where I've rubbed a little too hard and removed some of the image.  I like to think it adds to the antique look of the image and I play it up by further distressing the rest of the paint finish.  Even the image transfer masters admit that their transfers aren't perfect, at first.  Many will come back and "touch up" their image with their paint palette and a small brush when all is said and done.

When I was satisfied with my image transfer, I had some fun creating a raised stencil relief with Artisan Enhancements Pearl Plaster.  I used the Leafy Scroll stencil from Artisan Enhancements for this one after I made a few adjustments to it with my scissors so that it would lay flat inside of the cupboard door's "frame."  If you want to read more about raised stencil reliefs, have a look at my Crown Jewels project.  I go into more detail about the process there and although I used Artisan Enhancements Fine Stone for that one, the technique is the same.

Artisan Enhancements Scumble is a tintable glaze-like medium.  I created my own custom glaze for this project by adding about a teaspoon of Pearl Plaster and a teaspoon of Provence Chalk Paint® to 5 teaspoons of Scumble.  I brushed this mixture all over my piece (after the raised relief was completely dry) and let it sit for about two minutes before wiping it back with a damp sponge.  I played with the glaze for a bit, adding more and wiping it back again until I was happy with the effect.

I chose Clear Finish by Artisan Enhancements to seal this project when it was finished and completely dry.  Clear Finish is a protective sealer that provides some sheen which was what I needed to highlight the shimmer of the Pearl Plaster glaze and relief.


To see if there is an Artisan Enhancements retailer near you, visit www.artisanenhancements.com and enter your zip code on the "find a retailer" page.  The full line of Artisan Enhancements products and stencils are also available to order online here:  https://shop.artisanenhancements.com/

Thank you so much for your visit today!  More projects are in the works and will be shared soon, so please be sure to connect with me on Facebook, Instagram and if you're a fan of the videos, please subscribe to my YouTube Channel as well!  

Best Wishes and Blessings,
Amanda


Sharing With:
Home Sweet Home at The Charm of Home
Feathered Nest Friday at French Country Home
Show and Tell Friday at My Romantic Home
Treasure Hunt Thursday at From My Front Porch To Yours
What's it Wednesday at Ivy and Elephants

Tuesday, February 16, 2016

Elegant Lady Art Board


Just a quick post to share an art board I finished up and delivered to my booth this week!  I found the beautiful image on The Graphic's Fairy page and transferred it directly onto the board using Artisan Enhancements Transfer Gel!

I am finishing up a still frame video of the transfer process that I hope to have ready to share with you later this week!  So many of you have asked about the Transfer Gel and although the tutorials are helpful, I think you will get a better idea of the process when you actually see it happen before your own eyes!


Once I had completed the image transfer, I painted around the image with Old Ochre Chalk Paint® and then applied Artisan Enhancements VP Antico for an aged plaster look.  I then used the Rosy Vine stencil to create a raised relief in areas, also with VP Antico.  

Annie Sloan's dark wax added a bit more depth and patina to the finish and I accented the vine motif with gold gilding wax.

I hope this post leaves you inspired to experiment with some new painting techniques and finishes!  There is just no end to the possibilities of what you can create!

Visit again later this week to see the image transfer process in my next jazzy art video!  See it first when you subscribe to my YouTube Channel and please follow me on Facebook for more project updates!

Best Wishes and Blessings,
Amanda


Sharing With:
Home Sweet Home at The Charm of Home
Feathered Nest Friday at French Country Home
Show and Tell Friday at My Romantic Home
Treasure Hunt Thursday at From My Front Porch To Yours
What's it Wednesday at Ivy and Elephants

Friday, February 12, 2016

Revisiting an Old Favorite and a Few New Projects


A couple of years ago I shared the details of this little keepsake I created for my daughter's room, here.


The project started with this thrift store find.  The frame I loved, but the print was not so nice.  Would you believe that I recently found the exact same framed print once again, this time at a garage sale?  It must have been one of those mass produced decor pieces.  I wanted to do something a little different with it this time around.


I painted the frame and print all in Antoinette Chalk Paint®, sealed with clear and dark wax then highlighted the frame's details with gold gilding wax.  I then added a vintage beaded earring that acts as a clip to hold a photo or other memento.

I first tried adhering the earring with epoxy which usually works for just about anything.  After allowing the glue to dry overnight, I pulled lightly on the earring and it came right off!  Darn!  I believe it was the wax that it had a hard time sticking to.  Determined to make it work, I used my staple gun to carefully secure the earring in place, then glued a piece of decorative trim over the staples to hide them.  That earring isn't going anywhere now!


While I had my Antoinette Chalk Paint® still out on the counter, I decided to paint a little vintage train case that had been sitting in the garage.  I used the Floral Scroll stencil from Artisan Enhancements to add some fun detailing in Old White and also painted the inside of the case in Provence.  I sealed it inside and out with Artisan Enhancements Clear Finish which is super easy to apply and gives a nice wipe-able, waterproof sheen which I thought would be ideal should someone want to use this case for makeup or even to pack food in!


These little Avon lotion jars are another thrift store item I come across frequently and always pick up when I find them for a good price.  The jars are glass but the lids are plastic and usually have a silver finish that is flaking off.  I painted these in Old White, added a little Clear Wax and a whole lot of gold gilding wax.   


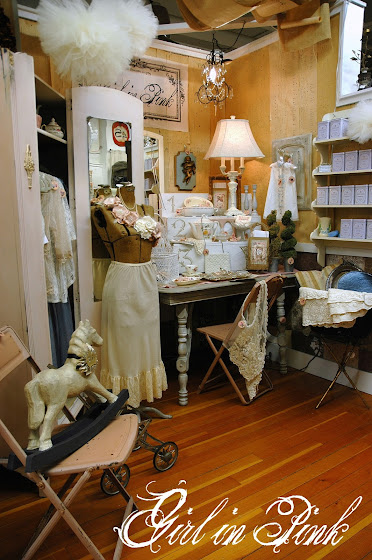
In addition to all of these little makeover projects, I also added several beautiful vintage slips to my booth.  They can be found hanging in the vintage pink wardrobe and I have more to bring in over the next few days!  So pretty and so fun!

Have a Happy Valentine's Day!

Thank you so much for your visit!

Best Wishes and Blessings,
Amanda


Sharing With:
Home Sweet Home at The Charm of Home
Feathered Nest Friday at French Country Home
Show and Tell Friday at My Romantic Home
Treasure Hunt Thursday at From My Front Porch To Yours
What's it Wednesday at Ivy and Elephants

Thursday, February 4, 2016

The Crown Jewels, Artistic Paint Finish Video and Tutorial


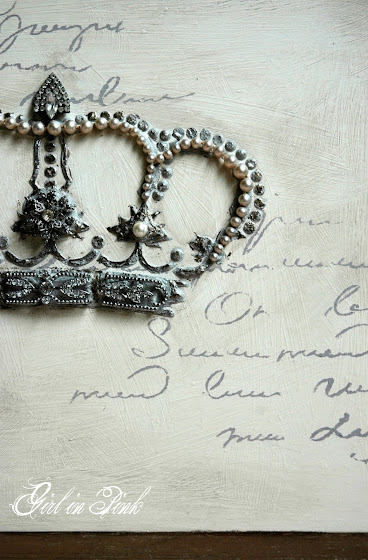
Artisan Enhancements Fine Stone is a plaster product with a stone like texture.  I came across a photo once where an artist had used this medium to incorporate sea shells into an artistic paint finish and the thought crossed my mind, why not jewels?


Ever since the idea came to mind, I have been dying to create a bejeweled crown using Artisan Enhancements Crown stencil and Fine Stone!  Here's the short video I made of the project unfolding.  Make sure your speakers are turned on.  I found the perfect song to go along with this piece!  


If you enjoy this video, I hope you will consider subscribing to my YouTube Channel!  I am in the process of filming more projects that I hope will spark interest and inspire others to try their hand at some new paint finishes and techniques!

Now, if you were intrigued by this video and really would like to create your own bejeweled crown or put some of the techniques I showed to use, I am going to walk you through the steps with a little more detail here.


1.  Paint a wood cabinet door on off white color, creating texture in the paint finish by moving your paint brush in various directions as you cover the door.

2.  Once the paint has dried, lay down the Script stencil from Artisan Enhancements and stencil a few areas of the door to create a backdrop for your crown.  I used a lavender paint color with the Script stencil.

3.  When your stenciled areas are dry, you can position your crown stencil.  It's a good idea to also lay out your jewelry on the stencil at the this point to get an idea of the design you want to create.  I used three strands of pearls, parts of a head band, a vintage brooch and an old shoe clip.  If you follow me on Instagram, you might have seen where I played around with the arrangement of these pieces before I set them into the Fine Stone.  

4.  Artisan Enhancements Fine Stone is naturally white in color.  You may want to tint it with a little paint for your crown.  I added a small amount of dark grey paint to my Fine Stone before smoothing it over the Crown stencil with the Color Shaper tool.  As soon as you have covered the stencil design completely with Fine Stone, remove the stencil.

4.  While the Fine Stone is still very wet, position your jewels into place, setting them directly into the Fine Stone.  If you can, go ahead and allow the bejeweled Fine Stone to dry overnight.  By this time all but one of the jewelry pieces were completely secured to my crown.  I simply added a little epoxy to the back of the one piece that didn't adhere well and then gave it several more hours to dry.  I had time to put this aside and wait, but if you were in more of a hurry, a hairdryer would help speed things along.

5.  Artisan Enhancements Scumble is a tintable glaze.  To add dimension and play on the texture of the painted background, create a grey glaze by mixing 5 parts Scumble to 1 part grey paint.  Brush this mixture over the entire door, wiping it back immediately with a damp sponge.  Have a clean, damp cloth handy for the remainder of the project in case the glaze or any other product clouds your jewels.

9.  Allow the Scumble glaze to dry before applying Artisan Enhancements Leaf & Foil Size to select areas of the crown design and the border of the cabinet door with a small paint brush.  Choose areas that you will want to highlight with metallic foil.  Allow the product to tack-up.  This takes about 20 minutes.

10.  Lay down pieces of metallic foil, shiny side up over the areas where the Leaf & Foil Size was applied.  Gently burnish the back of the foil with a stiff brush and remove the foil.  I used the Silver and Pewter foils for this piece.

11.  Finally, seal your entire piece with a thin application of Artisan Enhancements Clear Topcoat Sealer, using the designated Top Coat Brush.


I love this photo of Marilyn from Gentlemen Prefer Blondes!  My best friend and I watched this classic movie many times during our high school years!  It made us feel especially glamorous as we did our hair and make up for school dances!  The song brought back such fun memories!

Thank you so much for your sweet visit today!

Best Wishes and Blessings,
Amanda


Sharing With:
Home Sweet Home at The Charm of Home
Feathered Nest Friday at French Country Home
Show and Tell Friday at My Romantic Home
Treasure Hunt Thursday at From My Front Porch To Yours


Thursday, January 21, 2016

Romantic Shabby Fabric Flowers


Sometimes I get so caught up in painting that I forget how much I love the little crafty projects too!


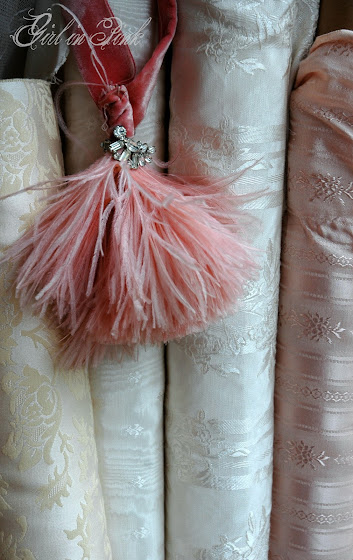
Earlier this month I shared that I recently came into a great deal of beautiful fabric.  I wasn't sure what I would do with it all but I knew I couldn't pass it up.  For weeks I have been enjoying it, just propped up in the corner of my dining room.

(Photo via Rachel Ashwell, Shabby Chic)

In the fabric post I also shared that for Christmas I received a couple of Rachel Ashwell's latest books that I had been missing from my collection.  I was so inspired by Rachel's fabric flower brooches, not just for wearing but for dressing up pillows, lampshades and adding a bit of vintage romance to the home.


I decided to put some of that fabric to use and ended up creating several fabric flowers, adding a bit of tulle and a vintage earring or grouping of pearls to the center of each.


I am still smitten with my dress form and have no plans of selling her anytime soon, but she is revisiting my booth at Camas Antiques at the moment as she displays the flower pins and corsages so beautifully!  I wrapped a piece of wire in tulle and pinned the flowers to it for display.  Now my pretty dress form is all dolled up for Valentine's Day!


I brought a bunch of new found treasures into my booth last night!  It ended up being a very late night of fluffing, rearranging, tagging inventory, and of course visiting with sweet dealer friends.


I have to say, I am loving my flower draped form next to my pink wardrobe full of lacy frocks!


Will there be more fabric flower making in my future?  We shall see!  They are sure fun and easy to make and I certainly have enough fabric to work with, but there are always a million other projects on the table.  And today the table is covered with a paint splattered drop cloth!  

Back to painting!

Thank you for your sweet visit today!

Best Wishes and Blessings,
Amanda


Sharing With:
Home Sweet Home at The Charm of Home
Feathered Nest Friday at French Country Home
Show and Tell Friday at My Romantic Home
Treasure Hunt Thursday at From My Front Porch To Yours
What's it Wednesday at Ivy and Elephants

Friday, January 8, 2016

My First Video! The French Bee, Layered Technique - Painting at the Dinner Table


It's a new year and what better time to try something new!  

So, I have stepped way out of my comfort zone and created my first video!  

This is something I had been thinking about, probably since I first started blogging.  
I knew I wanted to do things a little differently than the typical how-to, DIY videos.  My idea was to create a video that was informative and inspiring but not too serious or drawn out.  

What you will see is the progression of a layered art technique.  It's really just me, painting the day away at my kitchen table.  Yes, a whole day...but you get to see it in just 2 minutes!  Well, the camera was on all day, but of course I didn't paint all day.  There was plenty of time to catch up on laundry and cook meals while I waited for layers of product to dry...but all that happens behind the scenes.

I chose music that I typically listen to while painting (that is, when I have control over the Pandora station!)  I hope you enjoy it.  I think it goes well with the speed of production!  Unfortunately using copyrighted music on YouTube means an ad might pop up in the middle of the video.  Just click on the "x" in the right hand corner and it should go away.

Keep your eyes peeled for my sweet little Greta Garbo kitty who makes a few brief appearances! 


Now, I know that the video goes fast!  If I slowed it down and explained each step, it would be two hours long.  But now that you've seen the progression of techniques and how they are simply layered on top of each other to create this finished look, it doesn't seem so intimidating, does it?  

 I also wanted to show you how I paint and create right smack dab in the middle my home, complete with kids and pets running around.  I love that I don't have to worry about anyone in my home being exposed to harmful chemicals or toxic smells from the products I use.  Artisan Enhancements products are eco-friendly and have low-no VOCs which I consider a huge bonus!  

For those of you who would like more details and maybe want to give this technique a try...here is a complete list of the steps involved:

1.  Paint a wood cabinet door in Paris Grey.

2.  Once the paint has dried, lay down the Bee & Laurel stencil from Artisan Enhancements and use their color shaper tool to smooth a thin layer of VP Antico over the top of the stencil.  Pull the stencil off immediately.  Do not wait for the product to dry first.

3.  Out of all of the products used, VP Antico takes the longest to dry.  This is where you have time to do some laundry and prepare a meal...or whatever else you need to do!  You can also speed up the dry time with a hair dryer, if you wish.

4.  When the VP Antico is completely dry, lay the (clean) stencil back down and add some color to the design using a stencil brush.  I chose Versailles, Graphite and Provence to accent the Bee and Laurel design.

5.  Once that layer of paint has dried, apply Artisan Enhancements Crackle Tex over the inset area of the board.  I chose to leave the raised edge simply painted, to act as a frame for the design.

6.  Once the Crackle Tex is dry, apply a quick, fairly thick layer of Old White over the surface.

7.  As crackles begin to appear, grab a damp sponge and gently push the paint away from the raised design, distressing and creating more texture to the piece.  This is the step that probably takes the most thought.  Once you are happy with the overall look of the crackled and distressed areas, allow the piece to dry fully once again.

8.  Brush on a thin layer of watered down French Linen and wipe off the excess immediately with either a lint-free cloth or a clean sea sponge.  This is called a paint a wash.

9.  Wait a few moments for the wash to dry before applying Artisan Enhancements Leaf & Foil Size to select areas of the raised stencil design with a small paint brush.  Choose areas that you will want to highlight with metallic foil.  Allow the product to tack-up.  This takes about 20 minutes.

10.  Lay down pieces of metallic foil, shiny side up over the areas where the Leaf & Foil Size was applied.  Gently burnish the back of the foil with a stiff brush and remove the foil.  You might have noticed in the video that I came back and added more Leaf & Foil Size a second time.  After applying the first layer, I had decided it needed a bit more metallic.  I simply applied more Leaf & Foil Size, allowed it to tack up again and came back with more foil until I was happy with the overall look.

11.  Finally, seal your entire piece with a thin application of Artisan Enhancements Clear Topcoat Sealer, using the designated Top Coat Brush.


Thank you so much for stopping by!  I hope you enjoyed my first attempt at creating a video to showcase some of my favorite products and techniques!  And, I hope you came away with some new ideas and inspiration for your own projects!

Best Wishes and Blessings,
Amanda


Sharing With:
Home Sweet Home at The Charm of Home
Feathered Nest Friday at French Country Home
Show and Tell Friday at My Romantic Home
Treasure Hunt Thursday at From My Front Porch To Yours
What's it Wednesday at Ivy and Elephants


Monday, December 28, 2015

Shabby Chic Inspiration and Possibilities


Last month we made the 5.5 hour drive to visit my parents for Thanksgiving.  My mom and I managed to sneak away for a few hours and shop a handful of thrift stores she had been telling me about.  One of these stores had recently received a large donation of fabrics leftover from an older upholstery shop that had closed.  My mom and I pulled out the prettiest pastel bolts of fabric, studied each of them in the dim light and made our selections.


My husband was a bit flustered when I came back to the house and asked if we had enough room in the car to bring home a few extra purchases.  With 3 kids and a dog on our journey, the vehicle was already quite packed.  

"What did you buy?" he grumbled.  

"Just some fabric," I responded.

"Oh, well...we probably have room for some fabric."


And then he saw the 7 large bolts of decorator fabric I had just bought.  

No way were they going to fit, at least not without making the already cramped quarters even more uncomfortable for everyone.


And so, all of my beautiful fabric purchases had to stay with mom and dad until this last week when they came to visit us for Christmas!  Unloading all of my pretty fabric from my parent's car was like getting a big bonus Christmas gift!


Now, you ask...what will I do with all of this fabric?  

I honestly don't know.  I haven't gotten that far yet.

But...


My mom and dad brought me another Christmas gift.  This one was wrapped up with a bow and everything.  I shared on Facebook and Instagram today that I was embarrassed to admit that my Rachel Ashwell library was incomplete, up until this week.  These titles have been on my wish list for a very long time.  I fell in love with Shabby Chic 14 years ago when my husband and I were just married and bought our first house.  Rachel Ashwell's style drew me in right away and it was like I had found my own personal style while studying the beautiful photographs in her books.  

I have spent every free moment of the past few days reading my new books and staring at each and every photo.


After having been so consumed and wrapped up in Christmas, I don't have the usual feeling of sadness now that it's over.  I think it might have something to do with the inspiration I have gained from my new books, and the anticipation of future projects as I glance over my stockpile of fabrics!  In that same light, a brand new year begins in just a few short days.  A new year sure to be filled with so many new ideas, inspiration and possibilities!

Merry Christmas and Happy New Year!

Best Wishes and Blessings,
Amanda


Sharing With:
Home Sweet Home at The Charm of Home
Feathered Nest Friday at French Country Home
Show and Tell Friday at My Romantic Home
Treasure Hunt Thursday at From My Front Porch To Yours
What's it Wednesday at Ivy and Elephants