

If you’re a Downton Abbey fan, you are probably very familiar with this room. As captivating
as the characters and the plot of the show are, do you find yourself distracted by and in awe
of the furnishings and decor in each scene? In this room, the drawing room, it’s those
amazing doors that really make a statement, don’t you think? What if you could create your
own Downton Abbey drawing room doors?

Who says you need to live in an abbey or even have a drawing room to have beautiful doors?
A gorgeous door doesn’t need to be hung on hinges or lead into a room either. It can be a
statement piece in a room, an oversized, unconventional work of architectural art. Don’t you
just love the idea of pretty doors lined up on a big bare wall to display something pretty such
as a vintage gown?

Now that you’re thinking about how and where you might display some drawing room doors of
your own and dreaming about the pretty things you could hang from them, let’s walk through
the process of creating some Downton inspired doors with a little paint and some art mediums
from Artisan Enhancements.
Habitat for Humanity stores and salvage warehouses are great resources for old doors.
These particular doors had clearly been salvaged from a church remodel. There were a
couple dozen of them available at the Habitat store and many had placards on them giving
clue to their origin.
The patina on the hardware of this set of doors was perfect for the project at hand. After a
good cleaning and filling in a few holes here and there with wood putty, they were ready for
the first coat of Old White.

Once that first coat of paint was dry, it was time to map out the relief stencil design for each
door. Just two stencils were used for this entire project, both from the Artisan Enhancements
stencil line.
The next step was to prepare the VP Antico. It’s a good idea to scoop some of the product
out onto a plate and mix it up a bit with a fork before use to ensure even consistency.

This color shaper tool from Artisan Enhancements is ideal for creating raised stencil designs
with VP Antico, Fine Stone and Pearl Plaster.

With the stencil taped in place, the VP product is smoothed right over the top of it, covering
the entire design.
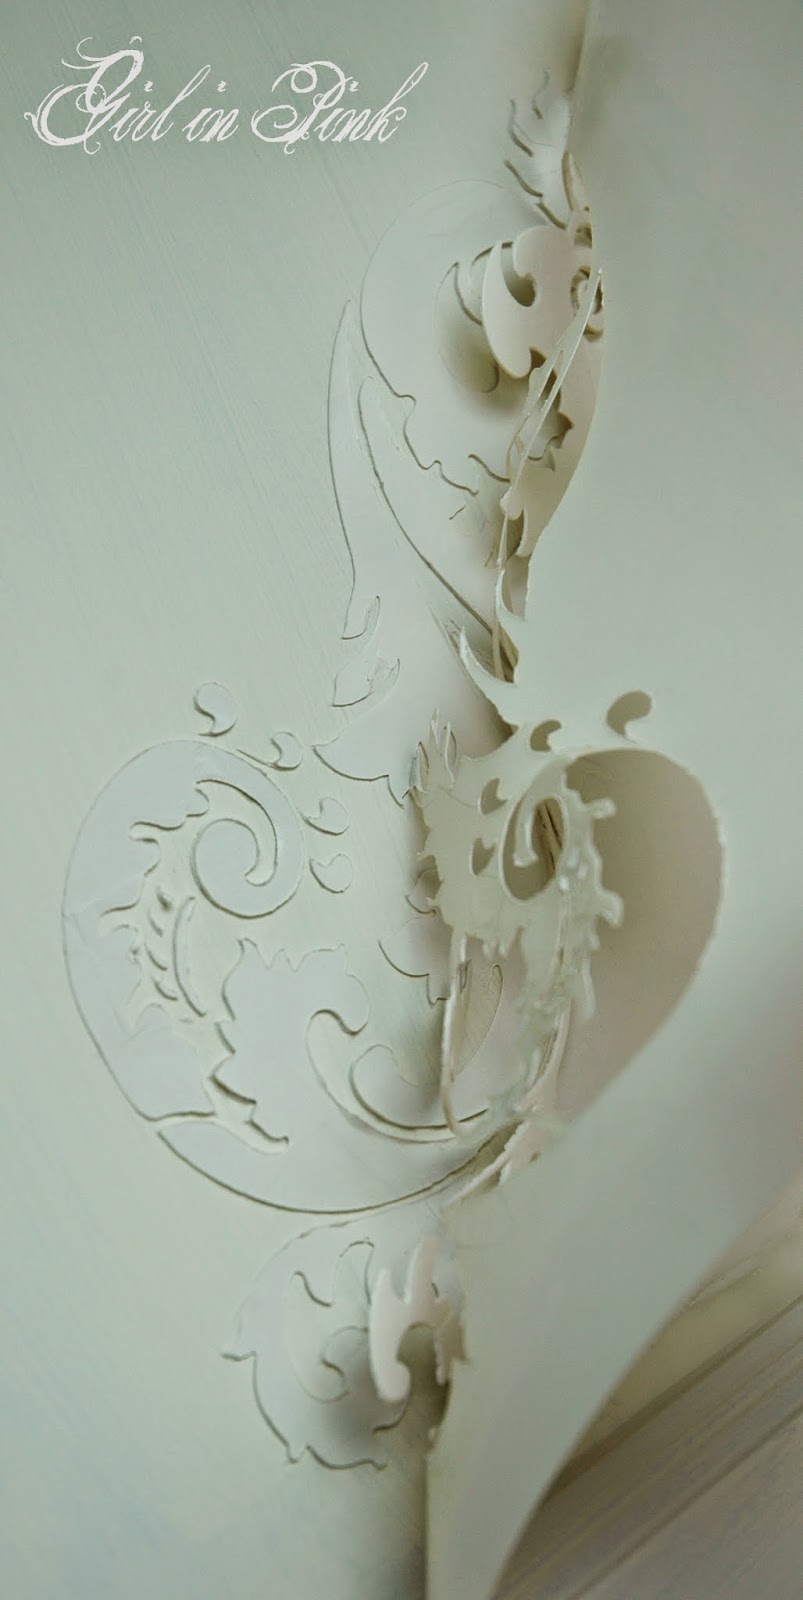
Immediately after completely covering the stencil with VP product, carefully pull the stencil
away to reveal the raised design underneath.

Continue this process all over the doors, in some areas using only part of a stencil and in
others maybe combine different portions to create your own design. When using a stencil
with a fleurish design such as this one, there is no rule that says you must use it straight on, in
whole and without modification. These particular types of stencils are very versatile in that
way.

In the interest of conserving product, always scrape the excess product off of your stencil with
your color shaper in between applications, returning the unused portion to your plate. Rinsing
the stencil at this time is a good idea to ensure that the next design goes on crisp and clean.
As long as the VP Antico has not dried on your stencil, it will rinse off easily with warm water.

After waiting at least a few hours for the stenciled designs to fully dry, brush on another coat
of Old White over the entire door, stencilled reliefs and all.

As soon as your paint is dry, you are ready to accent those raised designs with gold foil from
Artisan Enhancements. This poor Leaf and Foil Size container isn’t looking so pretty and new
after being used for several projects, but the sight of it brings some good points to mind that
are worth sharing. This product is extremely sticky, but it needs to be in order to do it’s job.
This particular jar of product has been used a lot and it shows it’s wear. On the other hand,
this little 8 oz. container has completed several projects and will still do several more. Dried
product can gum up around the rim of the container and make it difficult to open. Because the
product is water based, running hot water over the lid for a minute loosens it up enough so
that it opens easily.

Using a small brush, paint the Leaf and Foil Size onto the stencilled reliefs and the edge
moldings of the door. It’s a good idea to work in sections and watch the clock to make sure
each area is given enough time (15-20
minutes) to set up and become tacky before applying
the foils.

Cut sections of Artisan Enhancement’s Soft Gold foil to fit over each stenciled area. Laying it
down, shiny side up over the now tacky Leaf and Foil Size, use your fingers and/or a small
paint brush to burnish the foil.

Once the foil is pulled away, you may see areas where you need to go back and do more
burnishing. Run your fingers over the design to see if there are still sticky areas that you’ve
missed. If there are, simply put an unused portion of the foil over that area and burnish again.

The metallic foils really add something special to the raised stencil relief designs. Artisan
Enhancements offers metallic foils in 8 beautiful colors.

Using your Artisan Enhancements Top Coat brush, seal your doors with AE’s Clear Finish.
Clear Finish is a non-yellowing, all natural varnish that works well with whites and has a satin
to glossy sheen, making it ideal for sealing metallic foil finishes.


This was a big project, but one that makes a big statement. Bring a piece of Downton Abbey
glamor to your home with some gorgeous drawing room doors!
If you live in the Pacific Northwest, I hope you'll join in the Downton Abbey fun in Downtown Camas on Friday, January 2nd from 5pm - 8pm. These doors will be on display in the window at Camas Antiques as part of our Downton Abbey theme! For more details on this exciting event, please visit the event page on Facebook.
Thank you so much for your kind visit!
I hope you have a Christmas filled with peace, love and contentment!
Best Wishes and Blessings,
Amanda
Sharing With:
Home Sweet Home at The Charm of Home
Feathered Nest Friday at French Country Home
Show and Tell Friday at My Romantic Home
Treasure Hunt Thursday at From My Front Porch To Yours
Friday's Unfolded at Nancherrow
What's it Wednesday at Ivy and Elephants