Sometimes I get so caught up in painting that I forget how much I love the little crafty projects too!
Earlier this month I shared that I recently came into a great deal of beautiful fabric. I wasn't sure what I would do with it all but I knew I couldn't pass it up. For weeks I have been enjoying it, just propped up in the corner of my dining room.
(Photo via Rachel Ashwell, Shabby Chic)
In the fabric post I also shared that for Christmas I received a couple of Rachel Ashwell's latest books that I had been missing from my collection. I was so inspired by Rachel's fabric flower brooches, not just for wearing but for dressing up pillows, lampshades and adding a bit of vintage romance to the home.
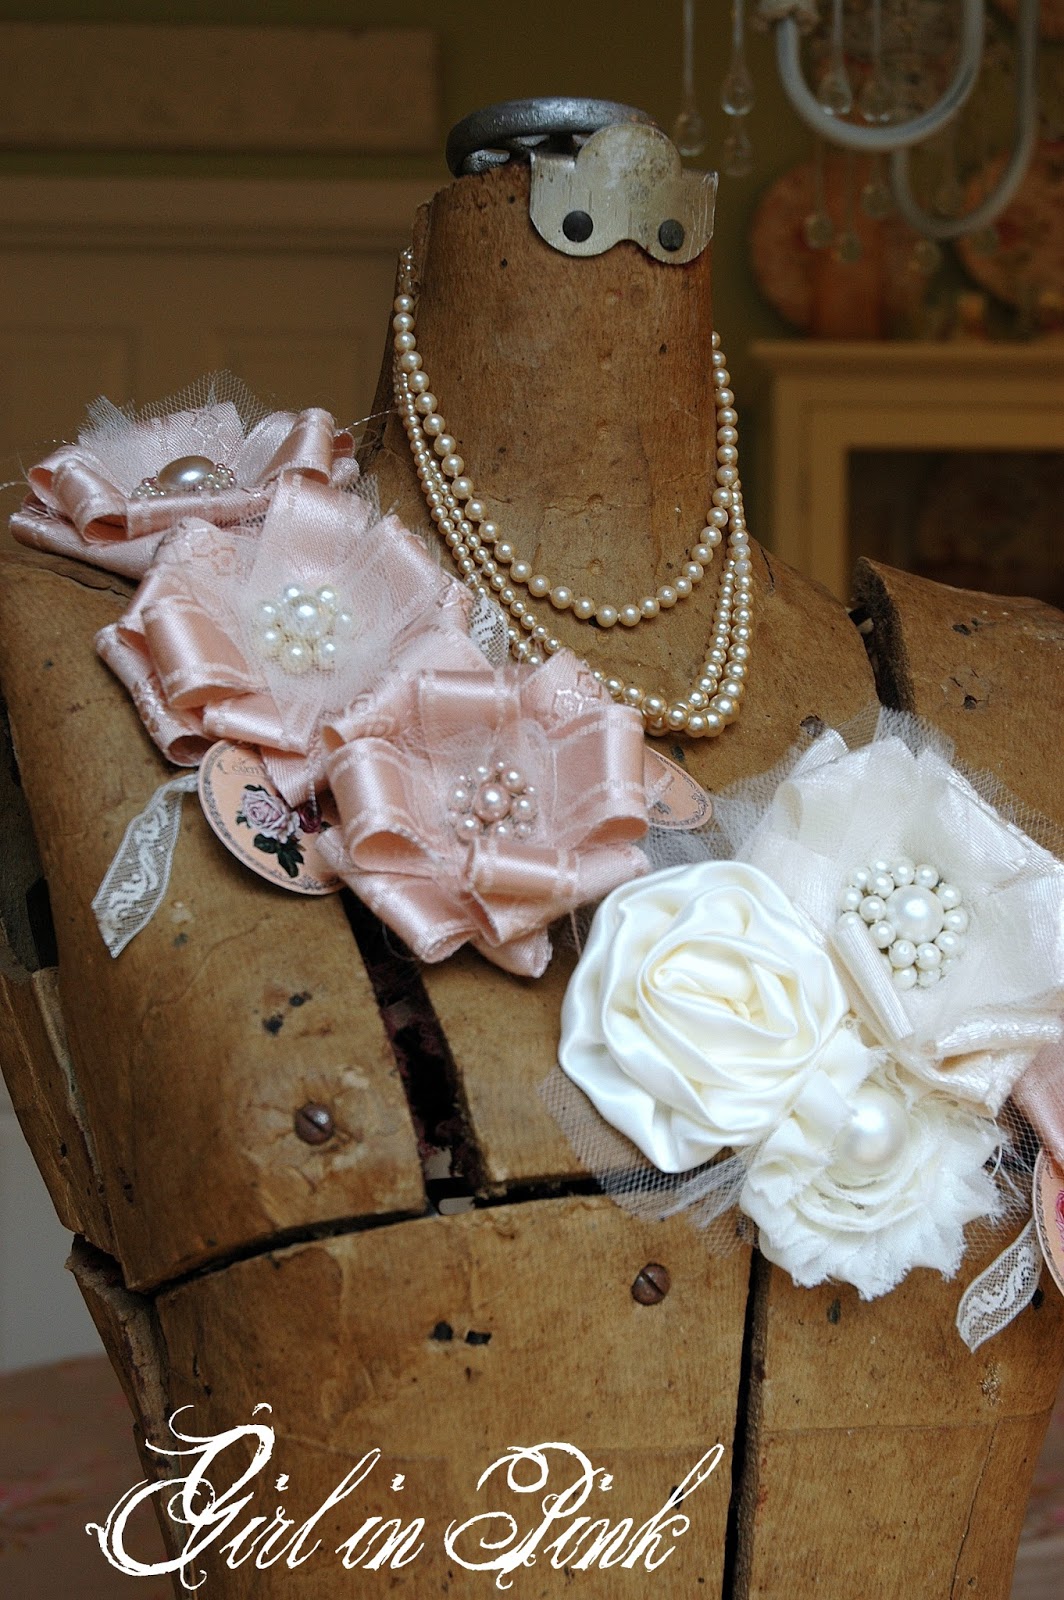
I decided to put some of that fabric to use and ended up creating several fabric flowers, adding a bit of tulle and a vintage earring or grouping of pearls to the center of each.
I am still smitten with my dress form and have no plans of selling her anytime soon, but she is revisiting my booth at Camas Antiques at the moment as she displays the flower pins and corsages so beautifully! I wrapped a piece of wire in tulle and pinned the flowers to it for display. Now my pretty dress form is all dolled up for Valentine's Day!
I brought a bunch of new found treasures into my booth last night! It ended up being a very late night of fluffing, rearranging, tagging inventory, and of course visiting with sweet dealer friends.
I have to say, I am loving my flower draped form next to my pink wardrobe full of lacy frocks!
Will there be more fabric flower making in my future? We shall see! They are sure fun and easy to make and I certainly have enough fabric to work with, but there are always a million other projects on the table. And today the table is covered with a paint splattered drop cloth!
It's a new year and what better time to try something new!
So, I have stepped way out of my comfort zone and created my first video!
This is something I had been thinking about, probably since I first started blogging.
I knew I wanted to do things a little differently than the typical how-to, DIY videos. My idea was to create a video that was informative and inspiring but not too serious or drawn out.
What you will see is the progression of a layered art technique. It's really just me, painting the day away at my kitchen table. Yes, a whole day...but you get to see it in just 2 minutes! Well, the camera was on all day, but of course I didn't paint all day. There was plenty of time to catch up on laundry and cook meals while I waited for layers of product to dry...but all that happens behind the scenes.
I chose music that I typically listen to while painting (that is, when I have control over the Pandora station!) I hope you enjoy it. I think it goes well with the speed of production! Unfortunately using copyrighted music on YouTube means an ad might pop up in the middle of the video. Just click on the "x" in the right hand corner and it should go away.
Keep your eyes peeled for my sweet little Greta Garbo kitty who makes a few brief appearances!
Now, I know that the video goes fast! If I slowed it down and explained each step, it would be two hours long. But now that you've seen the progression of techniques and how they are simply layered on top of each other to create this finished look, it doesn't seem so intimidating, does it?
I also wanted to show you how I paint and create right smack dab in the middle my home, complete with kids and pets running around. I love that I don't have to worry about anyone in my home being exposed to harmful chemicals or toxic smells from the products I use. Artisan Enhancements products are eco-friendly and have low-no VOCs which I consider a huge bonus!
For those of you who would like more details and maybe want to give this technique a try...here is a complete list of the steps involved:
1. Paint a wood cabinet door in Paris Grey.
2. Once the paint has dried, lay down the Bee & Laurel stencil from Artisan Enhancements and use their color shaper tool to smooth a thin layer of VP Antico over the top of the stencil. Pull the stencil off immediately. Do not wait for the product to dry first.
3. Out of all of the products used, VP Antico takes the longest to dry. This is where you have time to do some laundry and prepare a meal...or whatever else you need to do! You can also speed up the dry time with a hair dryer, if you wish.
4. When the VP Antico is completely dry, lay the (clean) stencil back down and add some color to the design using a stencil brush. I chose Versailles, Graphite and Provence to accent the Bee and Laurel design.
5. Once that layer of paint has dried, apply Artisan Enhancements Crackle Tex over the inset area of the board. I chose to leave the raised edge simply painted, to act as a frame for the design.
6. Once the Crackle Tex is dry, apply a quick, fairly thick layer of Old White over the surface.
7. As crackles begin to appear, grab a damp sponge and gently push the paint away from the raised design, distressing and creating more texture to the piece. This is the step that probably takes the most thought. Once you are happy with the overall look of the crackled and distressed areas, allow the piece to dry fully once again.
8. Brush on a thin layer of watered down French Linen and wipe off the excess immediately with either a lint-free cloth or a clean sea sponge. This is called a paint a wash.
9. Wait a few moments for the wash to dry before applying Artisan Enhancements Leaf & Foil Size to select areas of the raised stencil design with a small paint brush. Choose areas that you will want to highlight with metallic foil. Allow the product to tack-up. This takes about 20 minutes.
10. Lay down pieces of metallic foil, shiny side up over the areas where the Leaf & Foil Size was applied. Gently burnish the back of the foil with a stiff brush and remove the foil. You might have noticed in the video that I came back and added more Leaf & Foil Size a second time. After applying the first layer, I had decided it needed a bit more metallic. I simply applied more Leaf & Foil Size, allowed it to tack up again and came back with more foil until I was happy with the overall look.
11. Finally, seal your entire piece with a thin application of Artisan Enhancements Clear Topcoat Sealer, using the designated Top Coat Brush.
Thank you so much for stopping by! I hope you enjoyed my first attempt at creating a video to showcase some of my favorite products and techniques! And, I hope you came away with some new ideas and inspiration for your own projects!